How to Align SVG Objects with Snapping and Guides
Use smart edges and centers, grid intervals, and exact artboard alignment to position vector artwork.
In this guide 5 sections
To line up SVG objects as you drag them, enable Snap above the canvas in the SVG editor. Smart snapping aligns moving artwork with the edges and centers of the artboard and other visible objects. For regular spacing, enable grid snapping in Canvas → Snapping & guides.
This tutorial centers a badge, aligns its supporting shapes, and explains when to use snapping, exact alignment buttons, or numeric positions.
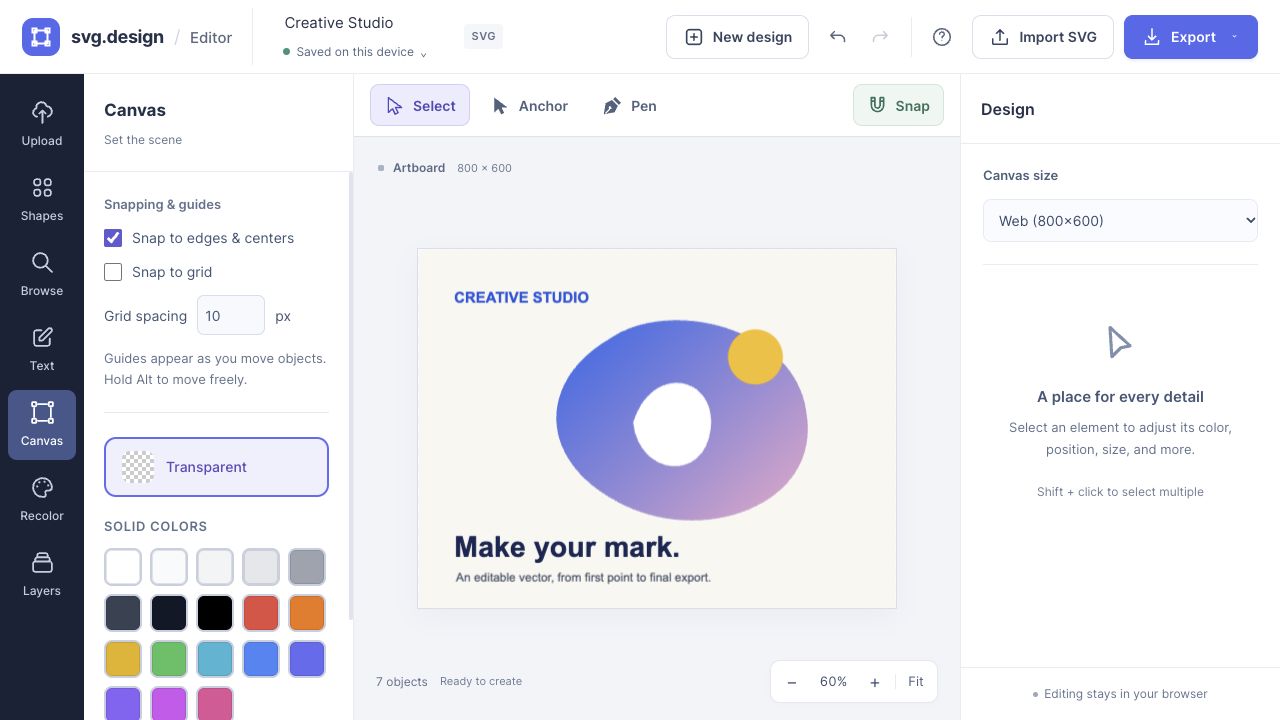
Center a badge on the artboard
- Add a badge or another shape from the Shapes tab.
- Click Snap so it is active. The keyboard shortcut is S while the canvas is focused.
- Open Canvas in the sidebar and keep Snap to edges & centers checked.
- Drag the badge toward the middle of the artboard. Magenta guides appear when its center or edge aligns with a target.
- Release when the desired guides appear. Move a second object nearby to align its center or edge with the first.
Smart guides appear during the movement and disappear afterward. They are editor aids and are not included in SVG, PNG, or JPG exports.
Use a grid for a consistent layout
Grid snapping is useful for icon families, flow diagrams, and layouts that use repeated spacing. It makes positions fall on a regular interval instead of relying on visual estimates.
- Open Canvas → Snapping & guides.
- Enable Snap to grid.
- Enter a Grid spacing in pixels. For example, use 8 for an 8-pixel layout rhythm or 20 for a larger diagram.
- Keep the top Snap toggle enabled and drag an object to see it settle onto the interval.
Spacing can be set from 1 to 1,000 pixels. Grid snapping controls placement; it does not add a printable grid to your SVG. Use the separate SVG grid generator when you want actual grid artwork.
If you need only grid targets, turn off Snap to edges & centers. If both are enabled, smart targets and grid positions can both influence placement.
Align drawing points and nodes
Snapping also helps when placing points with Pen or moving anchors in Anchor mode. It is useful for a symmetrical-looking outline or a connector that lines up with a box.
Hold Alt during a movement to bypass snapping temporarily. In Anchor mode, Alt also lets you move a curve handle independently, so use it deliberately when changing tangents.
Choose the right alignment method
| Goal | Use |
|---|---|
| Align while dragging near another object | Snap to edges & centers |
| Place artwork on regular intervals | Snap to grid with a chosen spacing |
| Center an object exactly on the artboard | Align to artboard → horizontal center and vertical center in the right panel |
| Enter a specific object position | X and Y in Position & Size |
| Move a point by a precise small amount | Canvas X/Y or arrow keys in Anchor mode; Shift + arrow moves 10 units |
The alignment buttons target the artboard. They do not distribute the gaps between several objects. Snapping currently assists moving objects and drawing points; it does not provide automatic equal-spacing distribution or a resize-snapping workflow.
Troubleshoot snapping
Why are objects not snapping?
Check the top Snap toggle, then verify that at least one target type is checked under Canvas. Release Alt if you are holding it. Move close to the target edge or center: snapping helps nearby alignment rather than pulling an object across the whole artboard.
Why does the object jump to a position I do not want?
Temporarily hold Alt for free movement, disable grid targets, or choose a smaller grid spacing. For an exact placement, enter X and Y instead.
Will snapping settings follow me to another computer?
The preferences are stored in the current browser. They are not account settings that sync across devices.
For a layout with multiple SVG files, follow the merge tutorial. Group finished components to keep their arrangement together.
Make it yours.
Keep this guide open and give it a try.